We closed on a house on Monday, and were demolishing by Saturday. I feel like I should say that this isn’t something I anticipated when buying a home, but to be honest, I love a good project.
I have MANY tips and lessons learned to share from our experience. The first being, this is NOT a one weekend project, and you need to consult experts and dive deep into researching / preparation before diving in.
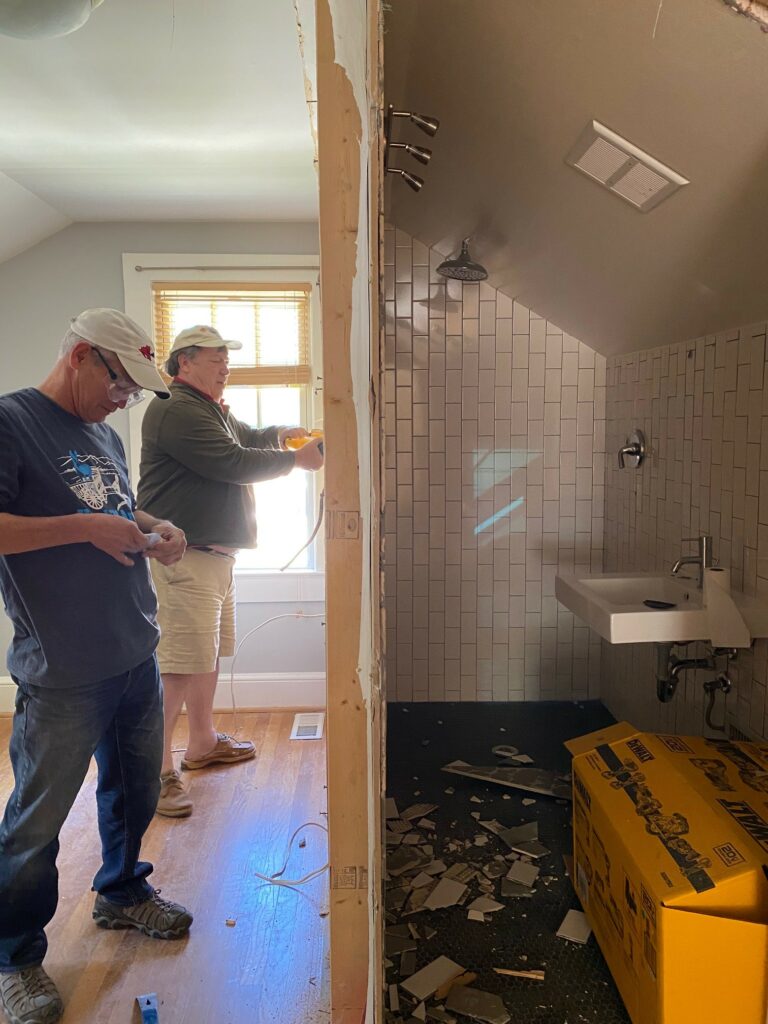
On Saturday, we had a structural engineer, a full time construction advisor, the brawn of my muscly twin brother and husband, and many other helping hands for debris. Here is what we learned!
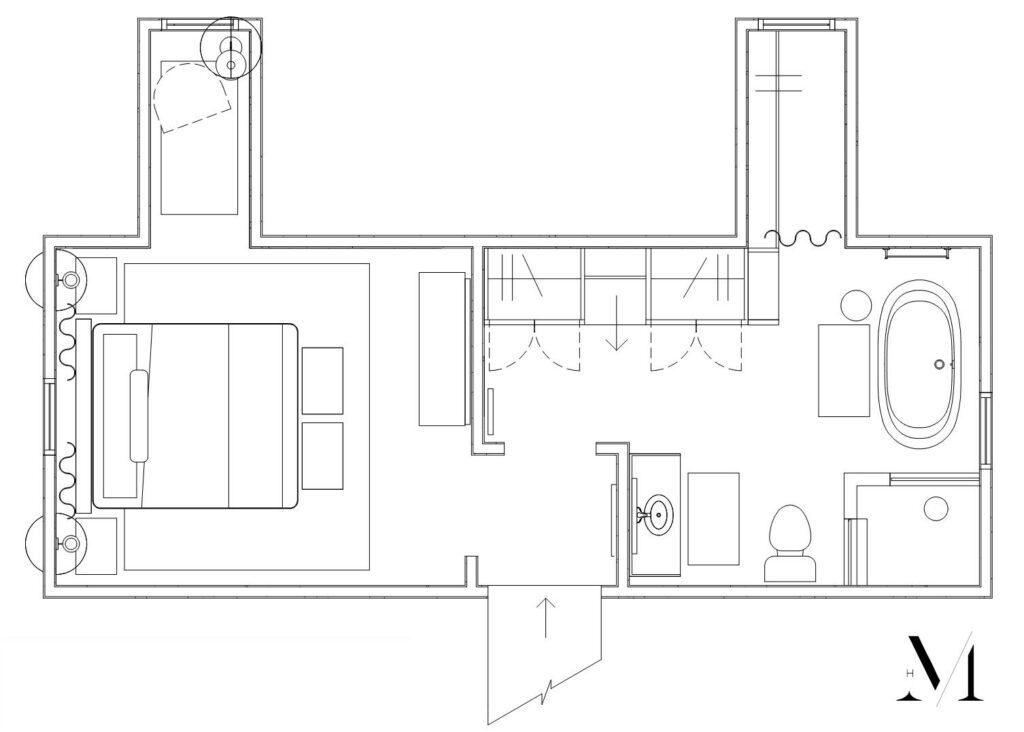
#1 MAKE A PLAN
Do not swing that sledgehammer without knowing what your final product is going to look like. We probably went through 6 different iterations of this floor plan before landing. Our intent was to save cost by limiting the number of walls we need to rebuild (cost of wood and therefore framing is SKY HIGH right now!) and limiting the amount of plumbing we’ll need to relocate. (PSA: Toilets are the most expensive to move – avoid if you can!)
#2 DETERMINE THERE IS NO STRUCTURAL / LOAD BEARING WALLS OR ELEMENTS
My mom is thankfully dating a structural engineer who analyzed the space a few weeks prior (actually when we were touring the house considering purchase). I highly recommend getting expert eyes to verify! If you don’t have that luxury – there are about a million YouTube videos out there than Kyle and I watched this past week.
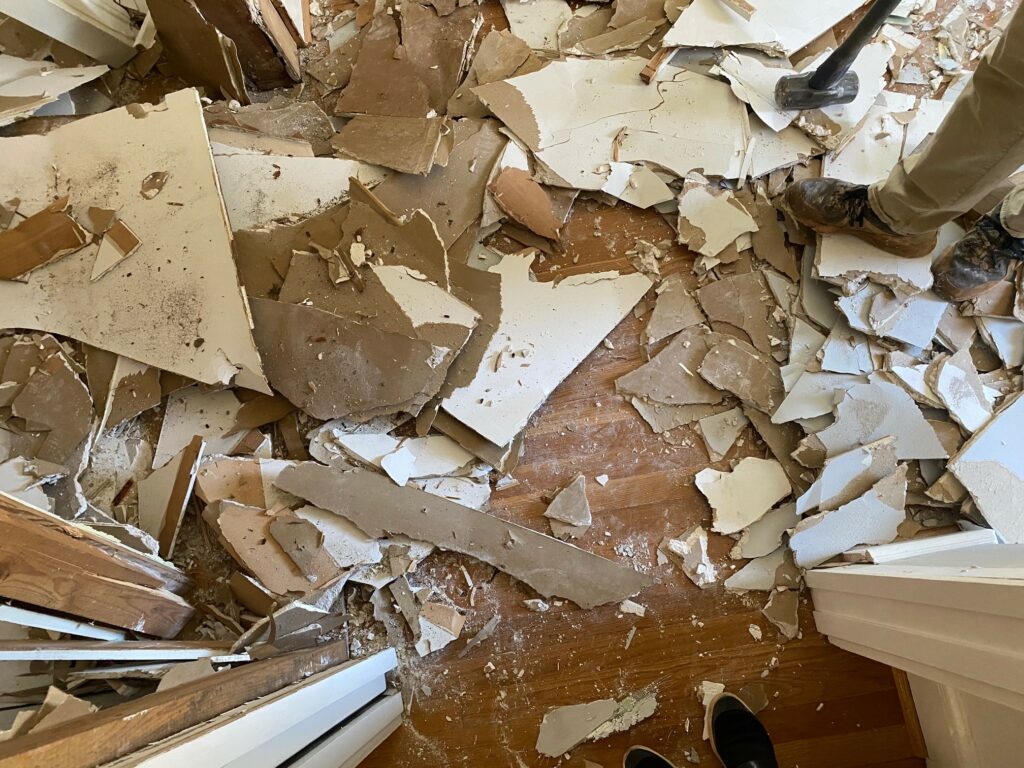
#3 RENT A DUMPSTER
We did not want to pay for a dumpster, so I did a lot of recon on our options, and I can officially say this was the smartest thing we did. We used Bagster! You simply purchase this large bag on Amazon (or from your local hardware store), fill it with non-hazardous debris, and then schedule a pick-up. The bag itself is under $30 and the pickup fee is $135. THIS SAVED US SO MUCH MONEY AND HEARTACHE. I will say we only purchased one, and retrospect we should have gotten two. We filled this bag to the brim, and saved some of the good-quality wood for later projects. We also made nice with a new neighbor and dumped some extra wood in their dumpster … So learn from us, be sure to analyze how much debris you’re going to have – you may need two!
#4 TURN OFF ALL ELECTRICAL & WATER
We bought this voltage tester and it was imperative during demolition. We turned off all the electrical from our breaker box/control panel prior to starting, but before cutting ANY wiring or even going near it, we would test to be sure they’re not “live”. You will also need electrical caps to ensure any outlets/switches/lighting you remove can be capped for safety.
There was also a moment during demolition when I accidentally turned on the shower while I was standing under it. Learn from my mistakes please – turn off your water prior to starting.
#5 WEAR PROTECTIVE GEAR
There are inevitable bumps and bruises along the way, but PLEASE PLEASE wear heavy duty work gloves, glasses/goggles to protect your eyes and a mask.
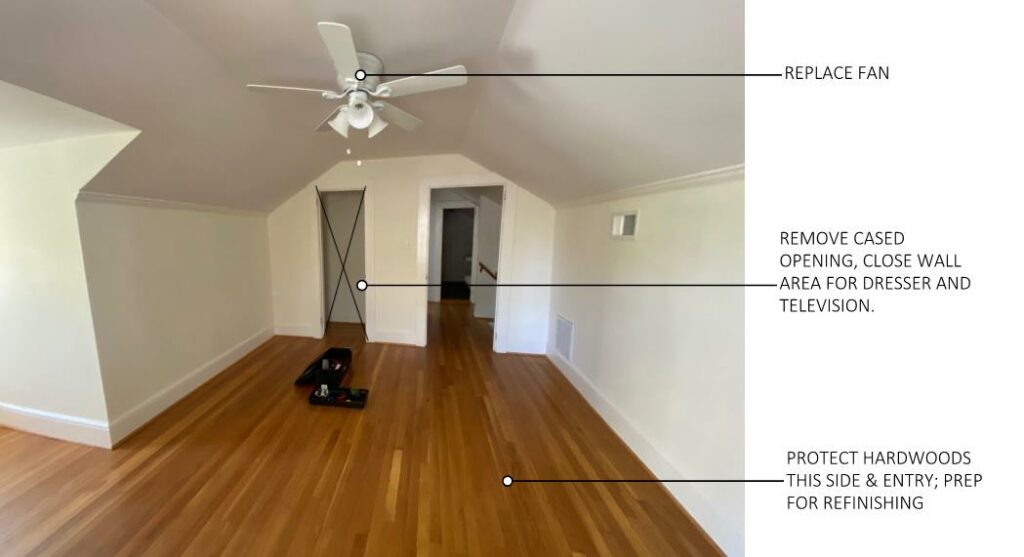
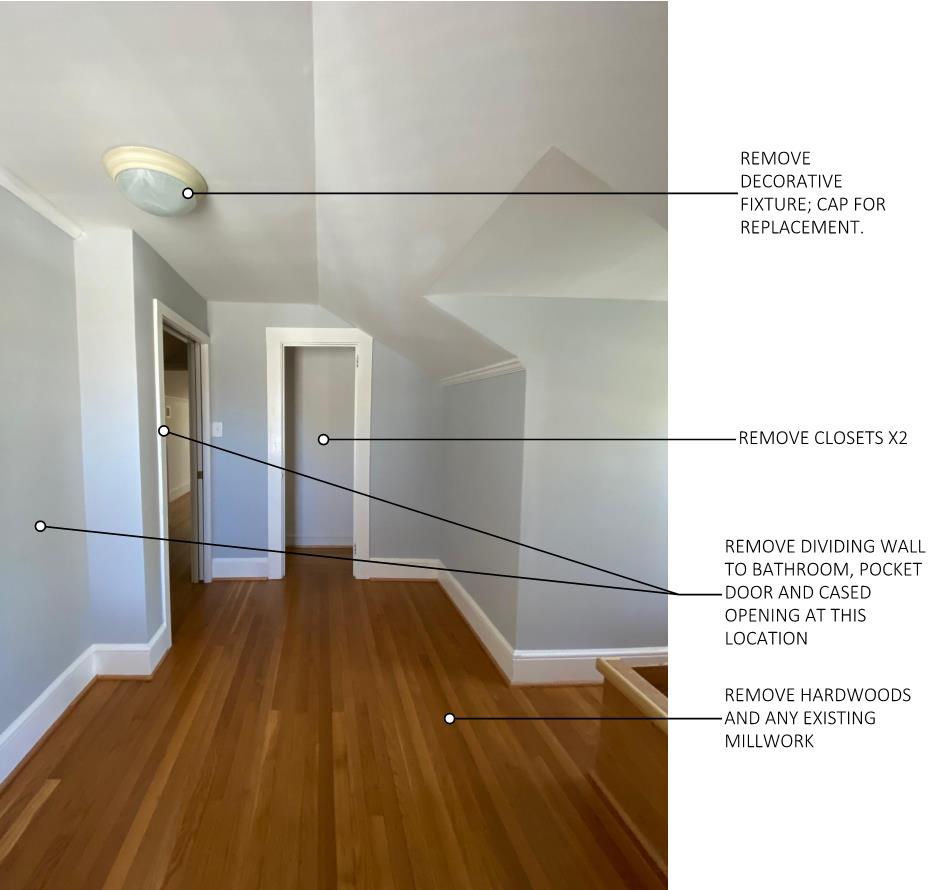
Now onto our space, here are some before photos:
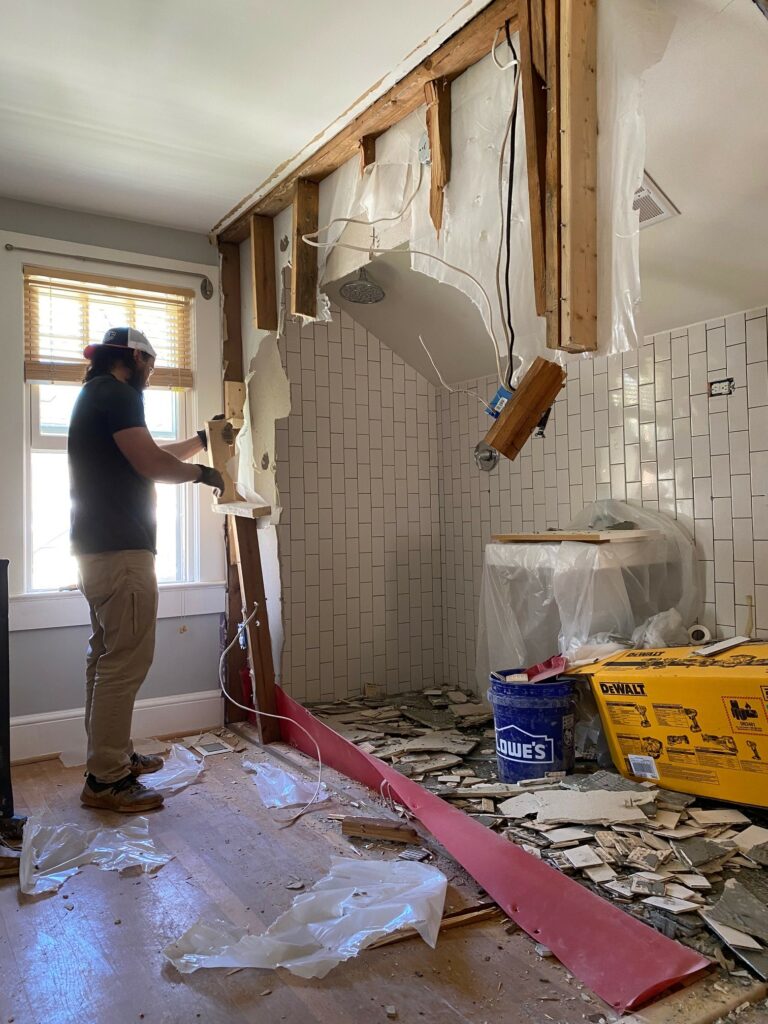

We still have some tile to take down and clean-up, but this progress made us feel so accomplished. We are eternally grateful for the friends and family that donated their blood, sweat, and time to helping us make this house our home. I’ll never be over it!
YOUR DEMOLITION SHOPPING LIST:
Bagster (The “dumpster” of your dreams!)
5-Gallon buckets for hauling debris (we used 3 – they are about $4 at your local hardware store)
Chisel for tile removal
Mask – courtesy of living through 2020.
*Please note, none of this is ‘expert’ advice. These are just the rough guidelines and products that Kyle and I used on our own small demolition project. Please consult professionals prior to demolition of your own space.